


Note: This page contains affiliate links to products. We may receive a commission for purchases made through these links.
It’s been about four years now since my original post about how to sync Scrivener with Android devices for writing on the go. Since then, Scrivener 3 has been released for Windows and I felt it would be appropriate to review the steps of the original post and see if they remain the same.
If this is your first time exploring how to work on your Scrivener projects on your Android device, the idea is simple: by using the External Sync feature of Scrivener together with Dropbox and an Android text editing app, you can work on your Scrivener projects wherever you are. The steps below will show you how to do this, step by step.
What you need
To be able to sync Scrivener with Android devices, you first need a few applications: Scrivener, a cloud storage solution (I’m using Dropbox) and a text editor on your Android devices that supports Dropbox.
Scrivener
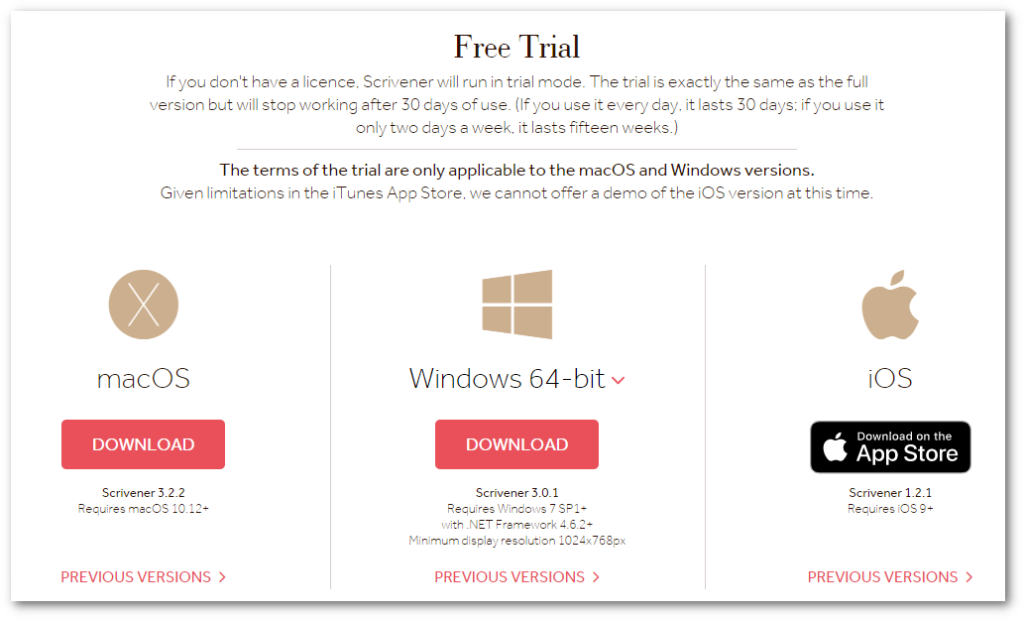
First things first. If you don’t have Scrivener, go to the website right now and check it out. They usually have a 30-day free trial which lets you check out the application if you’re not familiar with it already.
A Dropbox Account
If you’re anything like me, you’re already backing up your writing either in the cloud or on a physical backup device (I’d do both if I were you). To be able to sync with Android devices, you will need a cloud storage account. I’ve used Dropbox for years so for me it’s not a difficult pick.
I should emphasize here that over the years, Dropbox has been the recommended solution to use for syncing Scrivener projects. Although what you’ll read below may work just fine with other cloud solutions such as OneDrive or Google Drive as well, I have not tried these so I can’t speak to how well they work. It’s easy enough to give it a try though by just replacing Dropbox references below with your favorite cloud storage provider. Just be careful: you don’t want to accidentally corrupt a project.
If you don’t have a Dropbox account, you can use my referral link to sign up for a free, personal one. Follow all the necessary steps to setup your local sync folder on your computer as described in the installation process before you proceed.
An Android Text Editor
In my previous version of this post, I recommended Jotterpad. It’s a powerful writing application specifically made for writers (read my thoughts on an older version of JotterPad here: The Tools of A Writer – Writing On The Go With JotterPad). For me, it was perfect for this project since it contains the ability to sync directly with Dropbox. It is still a fantastic application.
However, since my original post four years ago, JotterPad has moved to a subscription model. To be able to sync with Dropbox, you are now required to purchase one of their subscription plans (Pro Cloud) in order to sync and edit Dropbox files.
As a result, for the demonstration below I’ll be using QuickEdit. Although it’s not geared towards novel writing per se, it’s a plain text editor with cloud storage accessibility, including Dropbox. The basic version is free and comes with ads. If you plan on using this solution long-term, I recommend paying the $2 to remove the ads and get QuickEdit+.
The Next Steps
Once you have the three pieces of software, you’re ready to get to work.
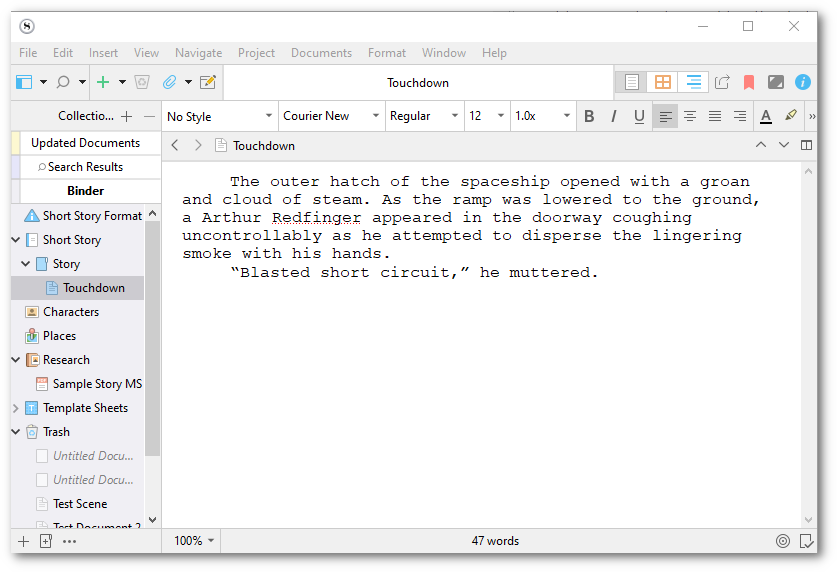
The first step, of course, is to write your story. For the sake of this post, let’s imagine you’re writing a story about Arthur Redfinger and The Green Alien (what actually happens to Arthur is, of course, of no consequence for the purposes of this post). Below, Arthur has just landed on an alien planet. The first steps of Arthur Redfinger’s adventures!
To be able to edit Arthur’s adventures on your Android device, you first have to sync the contents of your story with an “External Folder”. You can see the menu option below.
Note: “Sync with mobile devices” is not an option you want to use unless you have the iOS version of Scrivener, in which case there is little point in reading any further. None of the below stuff is likely to be relevant.
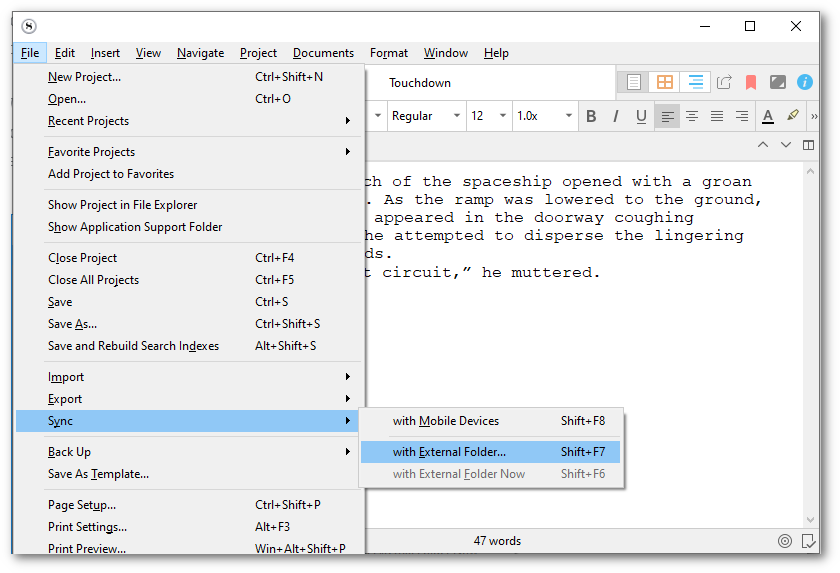
Before your first sync will happen, you will need to configure a few things, such as where the files will be saved, what format and so on. So, after selecting Sync > with External Folder as shown above, the following screen will appear:

At the top, you select the path of sync folder. It is important that this folder is within your Dropbox sync folder (or corresponding folder for other cloud services) for the files to be available on your Android device.
Also, change the Format for external Draft files option from RTF to plain text. All other options can be left alone. Then click Save.
Next, you’re actually going to sync your files with your Dropbox folder. Simply select Sync > with External Folder Now and you’ll be all set.

Now, you’re ready to shut that computer down, grab those car keys and find the closest coffee shop, Android device and Bluetooth keyboard in hand (the keyboard is not necessary but it does make typing much easier and much faster).
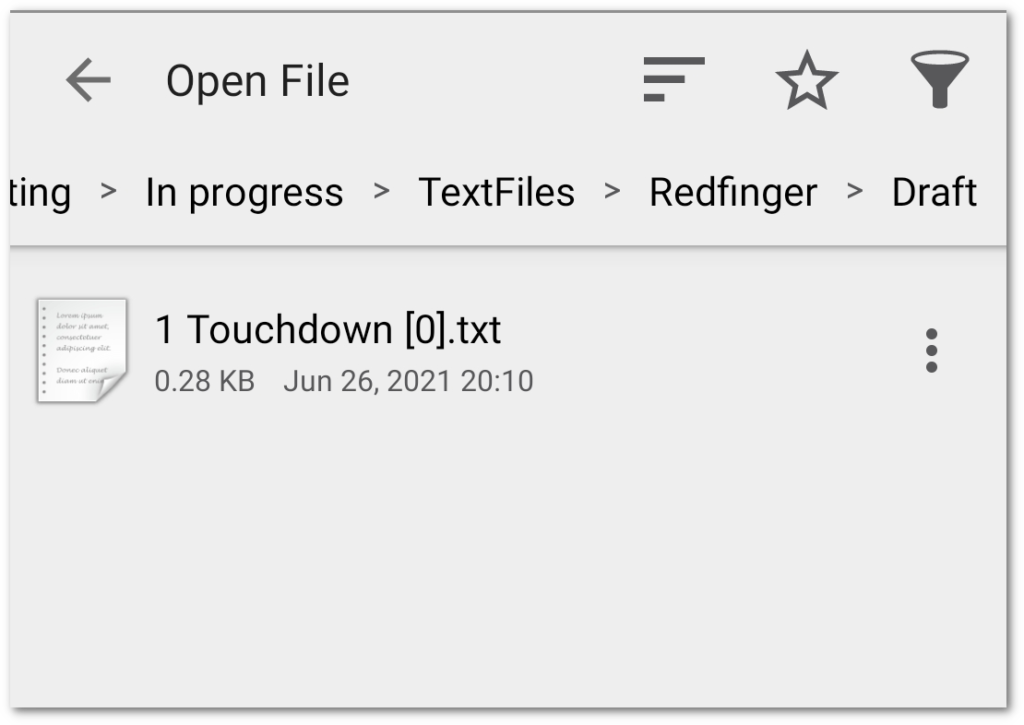
Order your coffee, tea or whatever your favorite brew is, find a table in a corner, and setup your keyboard and device. Load up your text editor and locate the folder you selected to sync your files to. It should look something like this (if you’re using QuickEdit):
Tap into the file that contains your new scene. Type away! For demonstration purposes, I only added two new lines, as seen below.
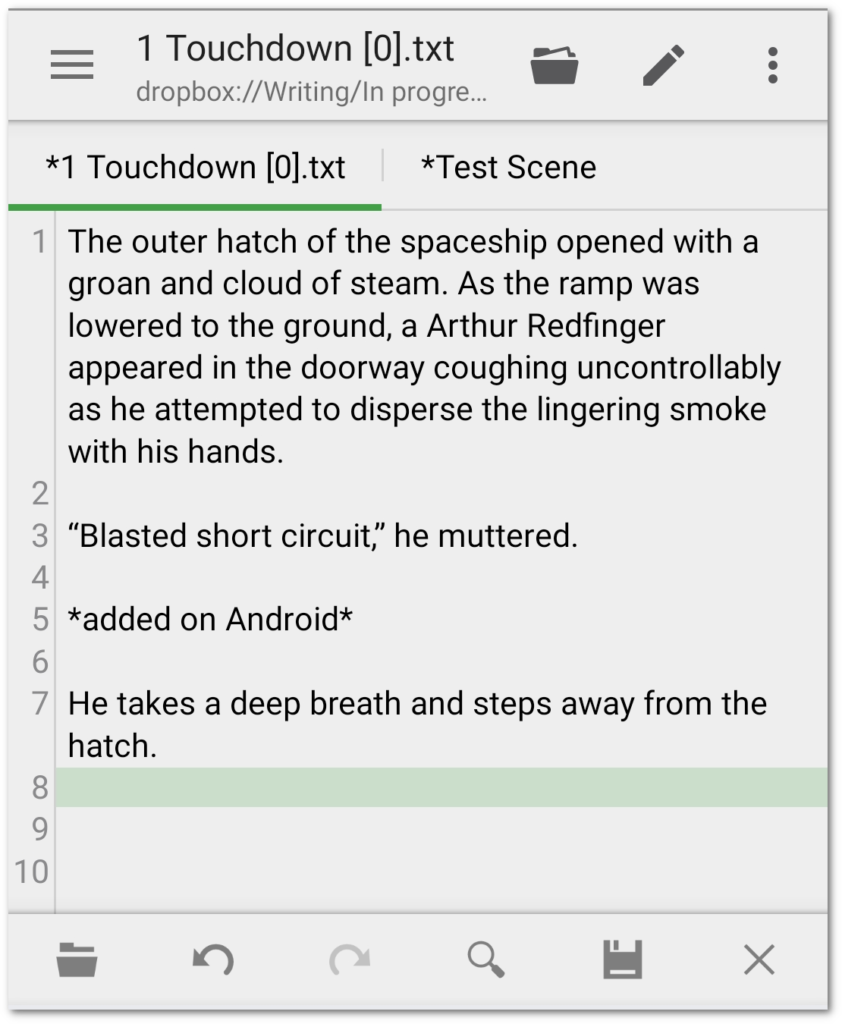
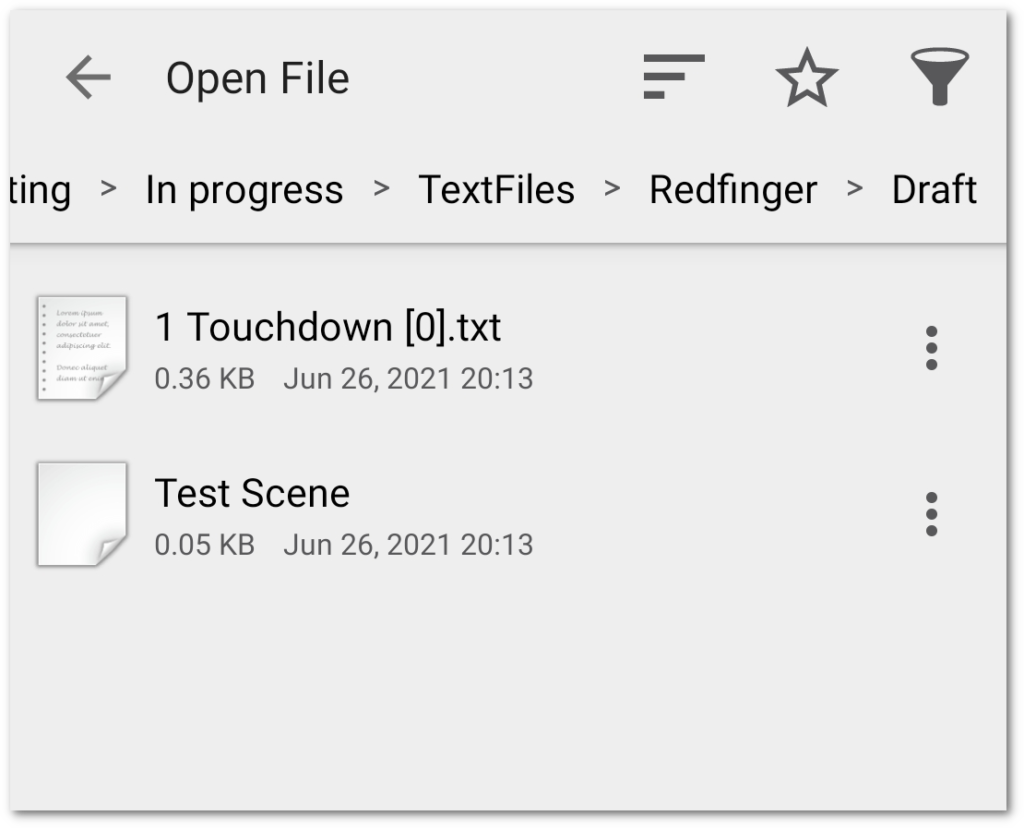
When you’re done, Save (this is an important step) and return to the file listing screen. Oh, but wait! You just had a great idea for a new scene. Quick! Create a new file. Remember to add the .txt extension to the file name.

Yes, there we are, the mystery of the green glob. Save the file and you’ll have something like this in the file listing.
Well, would you look at the time? It’s time to head home. Collect your things, throw away the garbage and hit the road. Turn on your computer and open up your story in Scrivener.
Note: before you do anything else, give your computer a few minutes to sync all changed Dropbox files. Usually, this happens instantly but just in case. In fact, verify the files have synced to your Dropbox folder and that you see the same ones on your computer as in your phone.

When you have verified that the Dropbox sync is complete, click Sync > with External Folder Now in Scrivener.

Once the operation has completed, you should see something like the below screenshot.

You should also see the fantastic new scene you added while at the coffee shop.
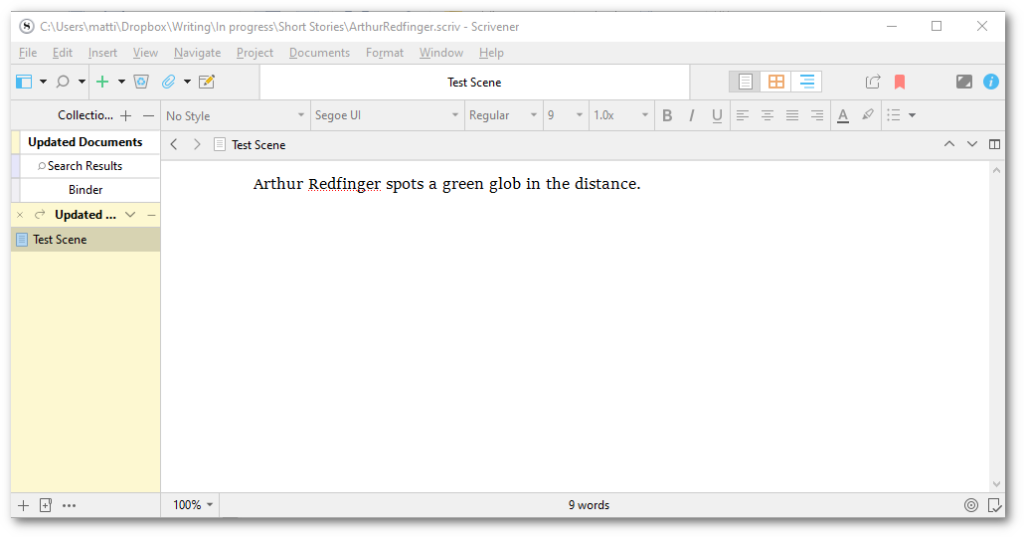
If you click back to your regular Scrivener Binder, you should also see your new scene added to the list of others in the folder structure. In the case of the below screenshot, the Test Scene is right below Touchdown.

There you have it. You have written a story in Scrivener, used Dropbox to sync with Android, added to your story with QuickEdit, and then used Dropbox to sync with your desktop and Scrivener.
Conclusion
Although Scrivener does not have a native sync option with Android, I hope the above steps have shown that working on your Scrivener projects on an Android device is actually very simple. It allows you to work on your projects on the go and quickly be up to date when you get back to your computer.
If you end up using this method, I’d love to hear about it. I’m especially interested in how this might work with other cloud storage solutions and also if you have other text editors that you think work better. This method also works with Chromebooks that can run Android applications and likely also through any Chrome OS text editors and applications. So, give it a shot and get writing on the go!


Office: Text-maker on Android is the best I’ve found for syncing with Scrivener. You can use rich text format and it syncs with dropbox. It’s completely free.
Thanks for the tip!
I’ve used this method to sync Scrivener with Android devices, and have recently adopted Obsidian (on Android/Windows/Linux) as my preferred notes+writing app. It is built to be more of a notekeeping app, but it works just fine as a barebones (but extensible) markdown text editor. Selecting Fountain as the format with md as the extension in Scrivener seems to let Scrivener read the formatting correctly, and you can point Obsidian to directories on Dropbox. Obsidian is now the only writing app I foresee using on my Android devices, unless a Scrivener for Android comes along.
I use Dropsync (Autosync would also work) to sync files to a local directory on the Android side for a local backup/working directory. Since Autosync (and probably other apps) will work with other cloud providers, I bet the above process could also be done with OneDrive, Google Drive, Box, etc. Maybe one of these days when ProtonDrive gets out of beta it’ll work with that as well.
I’ll have to check it out. I mostly use Joplin for my non-fiction stuff, which also has Android/Windows/Linux clients) but I’ll be sure to take Obsidian for a swing. Thanks for sharing!
I just discovered that the Android Dropbox app can directly edit text files so that’s another avenue. Not sure how long that’s been a feature. Obviously, I wasn’t paying attention on that front.
I have read your article carefully and I agree with you very much. This has provided a great help for my thesis writing, and I will seriously improve it. However, I don’t know much about a certain place. Can you help me?
I have read your article carefully and I agree with you very much. This has provided a great help for my thesis writing, and I will seriously improve it. However, I don’t know much about a certain place. Can you help me?
Thanks for sharing. I read many of your blog posts, cool, your blog is very good.