

Note: This page contains affiliate links to products. We may receive a commission for purchases made through these links.
By now, those of you trying to find a way to edit your Scrivener projects on the go with your Android device has likely seen some of my posts on the topic (most recently here, but also here). As those posts detail, there are several apps that lets you tap into the files created by the Scrivener sync function.
The common aspect of these prior posts have been these additional apps: write with Scrivener, sync between devices with Dropbox and edit with your favorite writing app.
Well, you don’t need to do that anymore.
No, Scrivener still doesn’t support Android with a native app. However, I happened to stumble upon a feature in Dropbox that makes additional writing apps unnecessary: a built-in text editor.
Yes, the Android Dropbox app does, in fact, have a built-in text editor. I stumbled upon this completely by accident over the holidays and you can imagine my excitement when I realized what this meant for my writing on the go.
Naturally. I had to share my discovery.
What you need
To edit Scrivener files on Android through Dropbox, you’ll just need a couple of applications: Scrivener and Dropbox (surprise!).
Scrivener
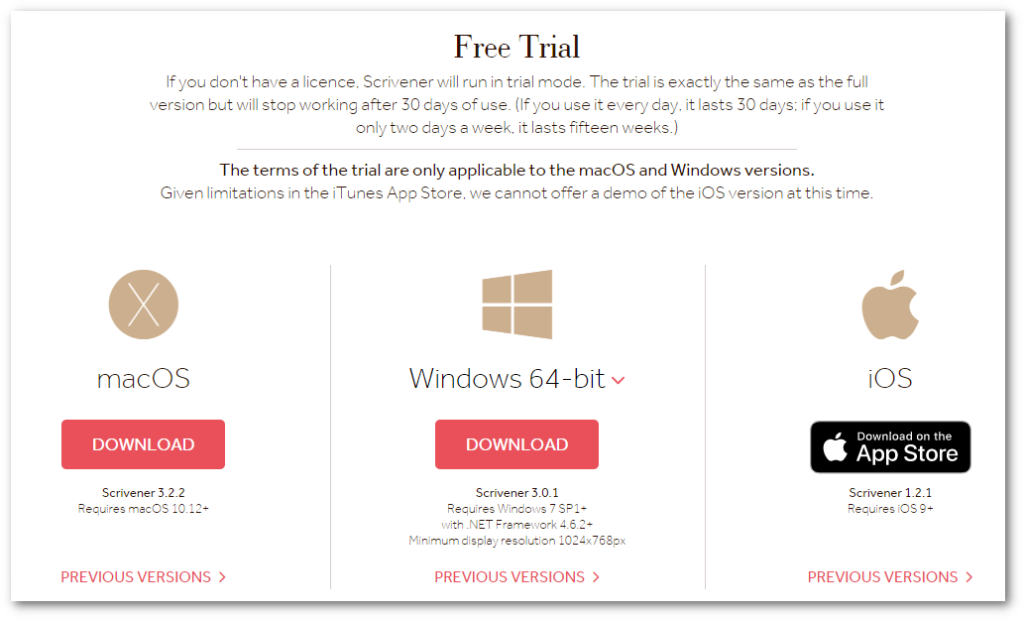
First things first. If you don’t have Scrivener, go to the website right now and check it out. They usually have a 30-day free trial which lets you check out the application if you’re not familiar with it already.
A Dropbox Account
If you don’t have a Dropbox account, you can use my referral link to sign up for a free, personal one. Follow all the necessary steps to set up your local sync folder on your computer as described in the installation process before you proceed.
Once you’ve signed up for Dropbox, don’t forget to download the Android app to your device.
The Next Steps
Once you have installed Scrivener and Android, you’re ready to get to work.
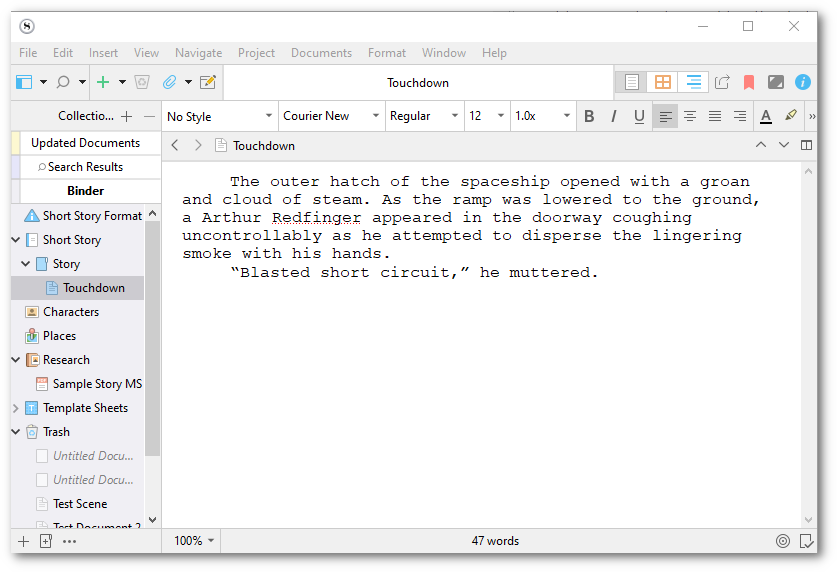
The first step, of course, is to write your story. For the sake of this post, let’s imagine you’re writing a story about Arthur Redfinger and The Green Alien (what actually happens to Arthur is, of course, of no consequence for the purposes of this post). Below, Arthur has just landed on an alien planet. The first steps of Arthur Redfinger’s adventures! And yes, it’s the same story I’ve used in all other iterations of this post about using Dropbox to help you edit Scrivener files on your Android device.
To be able to edit Arthur’s adventures on your Android device, you first have to sync the contents of your story with an “External Folder”. You can see the menu option below.
Note: “Sync with mobile devices” is not an option you want to use unless you have the iOS version of Scrivener, in which case there is little point in reading any further. None of the below stuff is likely to be relevant.
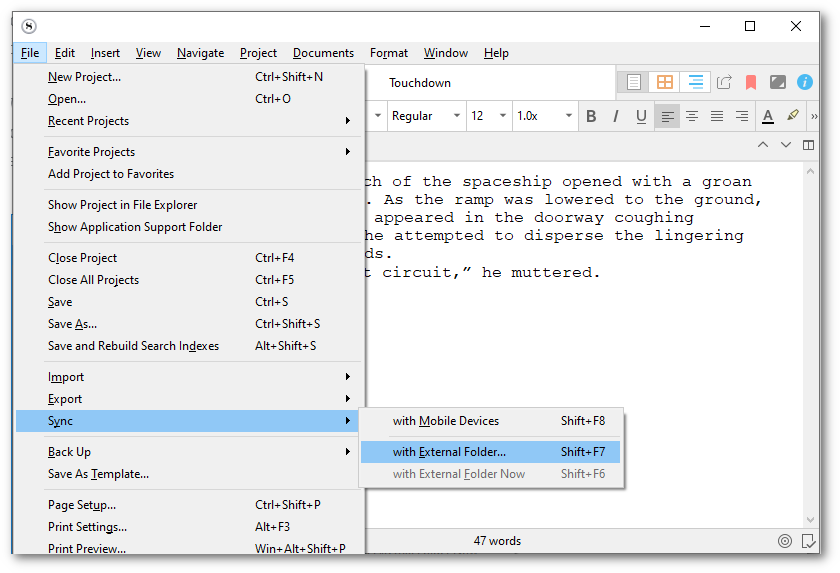
Before your first sync will happen, you will need to configure a few things, such as where the files will be saved, what format and so on. So, after selecting Sync > with External Folder as shown above, the following screen will appear:

At the top, you select the path of sync folder. It is important that this folder is within your Dropbox sync folder for the files to be available on your Android device.
Also, change the Format for external Draft files option from RTF to plain text. All other options can be left alone. Then click Save.
Next, you’re actually going to sync your files with your Dropbox folder. Simply select Sync > with External Folder Now and you’ll be all set.

Now, you’re ready to shut that computer down, grab those car keys and find the closest coffee shop, Android device and Bluetooth keyboard in hand (the keyboard is unnecessary, but it makes typing much easier and much faster).
Order your coffee, tea or whatever your favorite brew is, find a table in a corner, and setup your keyboard and device.
First, open the Dropbox app and find the draft folder in the directory specified in Scrivener. It should look something like this:
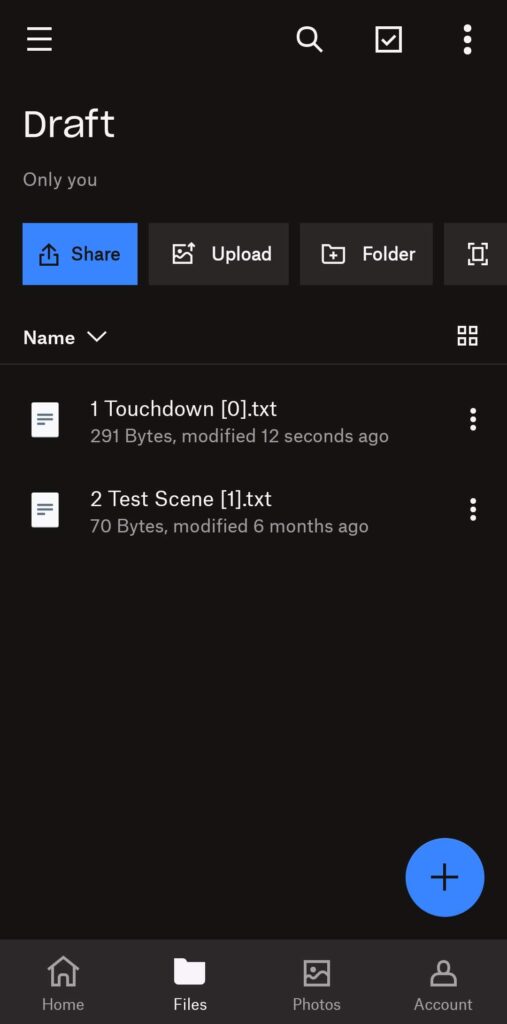
Click on the file you want to edit. At this point, you’ll likely get a pop-up that asks what application you want to use to edit the file. Select the Dropbox Text Editor.
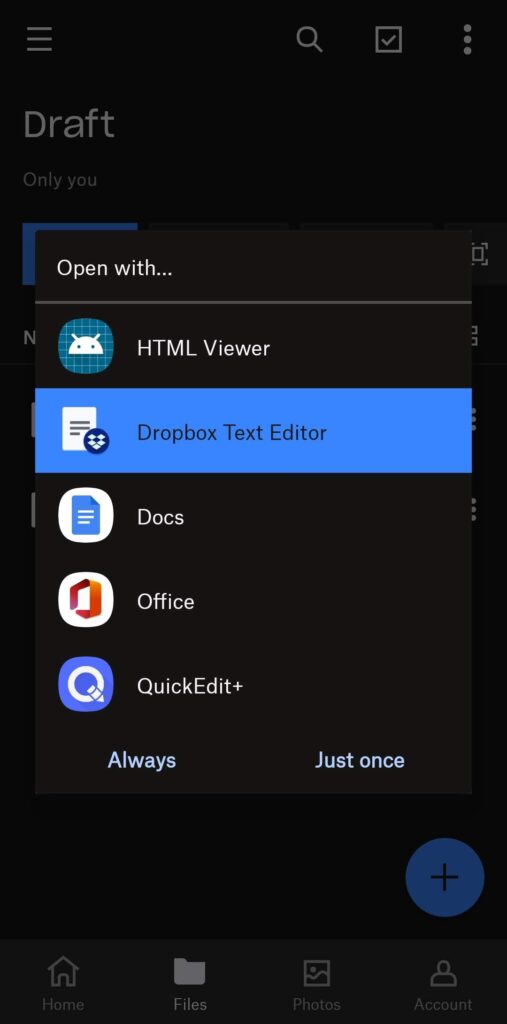
Edit the file as needed. In this case, I just added one more sentence that reads “added on Dropbox” as a simple proof of functionality.

Click the back arrow at the top left of the screen and save the changes when prompted.
While you’re at it, go ahead and create a new file called Test Scene.
Add some random words, then save as you did above. You’ve successfully edited your Scrivener project on the go!
Well, would you look at the time? It’s time to head home. Collect your things, throw away the garbage and hit the road. Once you get home, turn on your computer and open up your story in Scrivener.
Note: before you do anything else, give your computer a few minutes to sync all changed Dropbox files. Usually, this happens instantly, but just in case. In fact, you can verify that the files have synced to your Dropbox folder and that you see the same ones on your computer as in your phone.

When you have verified that the Dropbox sync is complete, click Sync > with External Folder Now in Scrivener.

Once the operation has completed, you should see something like the below screenshot.

You should also see the fantastic new scene you added while at the coffee shop.
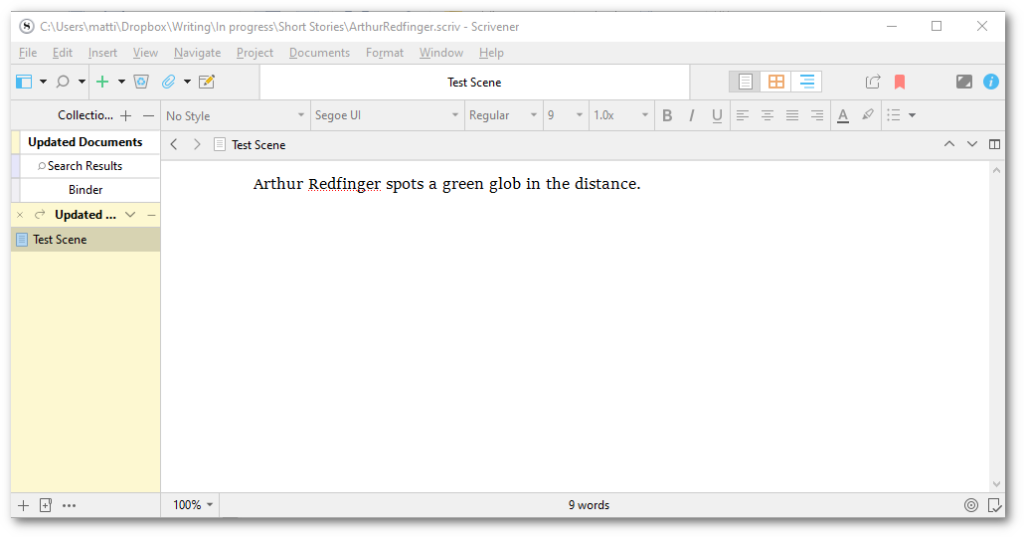
If you click back to your regular Scrivener Binder, you should also see your new scene added to the list of others in the folder structure. In the case of the below screenshot, the Test Scene is right below Touchdown.

There you have it. You have written a story in Scrivener, used Dropbox to sync and edit with Android, then synced the updated files back to Scrivener.
Conclusion
If you’ve followed my posts on this topic, you can clearly see a trend. Although Scrivener doesn’t have a native Android app, the Folder Sync feature allows an Android user to use Dropbox or potentially other cloud services to edit files while on the go. With Dropbox, it’s literally built into the app and allows you to work on your projects anywhere. At the same time, you’ll be almost instantly up to date when you return to your computer.
What do you think? Is this a solution you would use for writing or editing on the go? I’d love to hear your about your experience. Drop a note below!


Thank you so much!! I’ve been trying to work out how to do this for days- now it works!!
Glad to hear it! I’m using this quite a bit myself.
I have read your article carefully and I agree with you very much. This has provided a great help for my thesis writing, and I will seriously improve it. However, I don’t know much about a certain place. Can you help me?
I have read your article carefully and I agree with you very much. This has provided a great help for my thesis writing, and I will seriously improve it. However, I don’t know much about a certain place. Can you help me?
Reading your article helped me a lot and I agree with you. But I still have some doubts, can you clarify for me? I’ll keep an eye out for your answers.
Reading your article helped me a lot and I agree with you. But I still have some doubts, can you clarify for me? I’ll keep an eye out for your answers.