A few months ago, I wrote about how you can install Scrivener on your Chromebook. It’s a great solution if you want to take advantage of the power of Scrivener combined with the superior battery life and portability of some of the more lightweight Chromebooks (or just want to run Windows apps on your Chromebook).
At the time, I had experimented with the Windows beta version of Scrivener 3 as well. Unfortunately, it wasn’t quite working for me at the time so I left it alone. Just a couple of weeks I decided to give it another shot, simply because I’d like to transition to using it at some point.
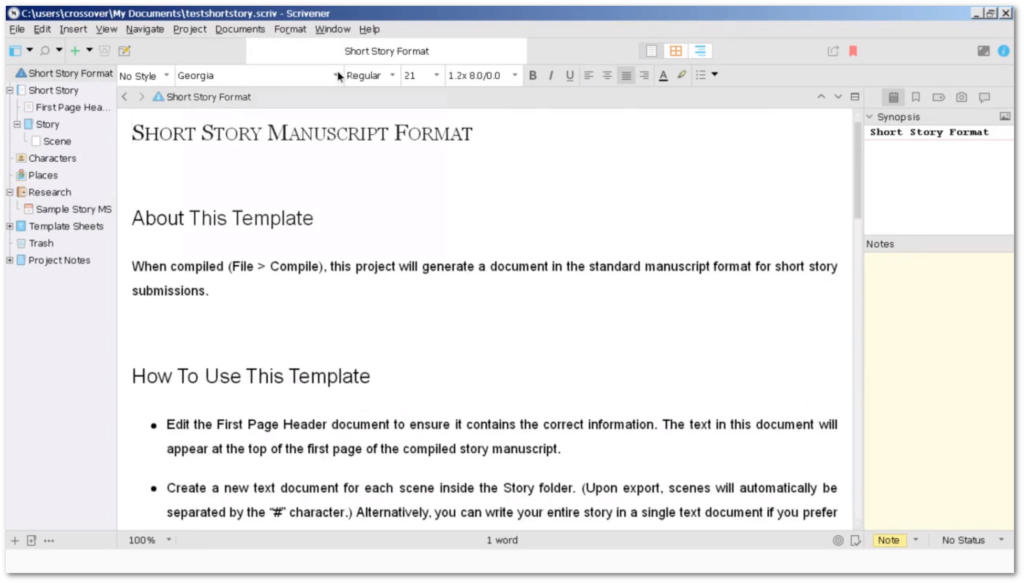
This time around, I had better luck. The latest beta installed without issues and with the addition of a few additional fonts, I now have the Scrivener 3 Windows beta running on my Chromebook. The rest of this post will detail how I went about doing this. Alternatively, you can just watch the video below.
Before we dig in, a word of caution. The beta version of Scrivener is, well, beta software. Although it runs pretty well and you can use it to write, that does mean you shouldn’t be surprised if you run into a bug or two, and that certainly means that it shouldn’t be a surprise when you install it in a non-native Windows environment. In other words, don’t be surprised if Scrivener 3 beta on a Chromebook crashes. It’s happened multiple times for me. If you’re planning on doing serious work with the beta, make sure you have good backups, just in case.
Before We Begin
Unlike the installation of the current version of Scrivener that already includes an installation script in CrossOver, this doesn’t apply for the beta version. You’ll need to download the installation file from the Scrivener website and manually install it. This may sound daunting to some but in reality, it’s pretty straightforward.
Download The File
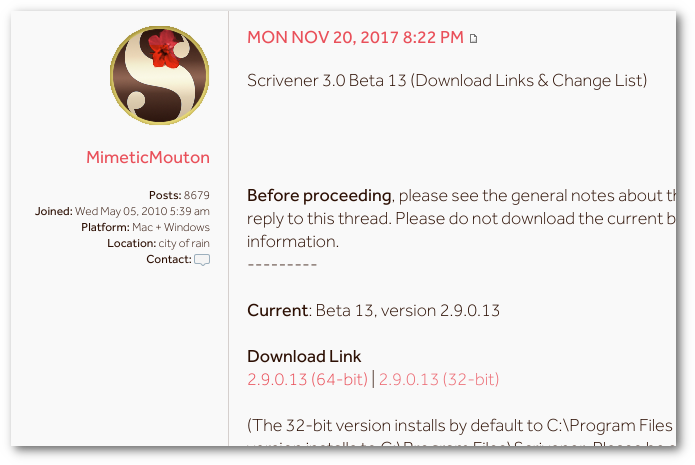
First things first: before we start the installation, we need to download the installation file from the Literature and Latte website and, more specifically, the community forum (link below).
https://www.literatureandlatte.com/forum/index.php
Scroll down to the Windows forums and click on the beta thread link.
Then, find the most recent beta software post. Inside, there will be two links to the latest version of the beta. Download the 32-bit version. CrossOver will not run the 64-bit version (I tried).

Once the download has completed, you’re ready to begin the installation.
Installing Scrivener 3 Beta
Open CrossOver
Type Scrivener 3 Beta into the search field. CrossOver will tell you that it can’t find the application and give you the option of using an installation file to install it. Click on that option.
Then, select the file you just downloaded. It’ll be named something along these lines, depending on which beta version you downloaded.
Once the installation kicks off, it’ll take a few minutes to run through the whole installation. The initial installation popup takes about 30 seconds to appear on my Chromebook so if you just see the moving “in progress” bar, just be patient.
Once the installation popup appears, just follow the prompts using all default options.
Additional Components
After completing the installation of the beta, we also need to install some of the typical Windows fonts. These are part of a number of additional components that can be installed through scripts already part of CrossOver.
From the main screen of CrossOver, click on the Manage Scrivener option.

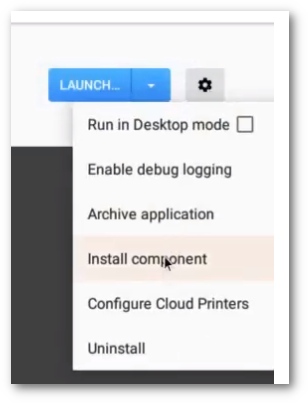
On the next screen, click the small cog icon in the upper right corner, then select Install Components.

Search for Core Fonts and click the install button. Click through any prompts that appear. This will take a few more minutes to complete.

Start Scrivener 3 Beta
Once the Core Fonts installation process has been completed, return to the main CrossOver screen and start Scrivener 3.
With the beta, you will see a prompt that tells you when the beta expires. Note that if the current beta you have installed has expired and there is a new one, you will need to completely uninstall the expired beta and install the new one.
The first time you start the beta, you will be prompted to select a backup location for your files. If you’re just testing it out, I wouldn’t worry too much about this portion but if you intend to actually try to use the beta for some serious writing, I’d suggest selecting a folder that’s with your Dropbox files (see my other post on installing and syncing Scrivener for tips on how to do this).
After this, you’ll see the regular Scrivener startup options.
From there, select whatever option you want to explore, whether it’s importing an existing project or starting one from scratch.

The beta of Scrivener 3 should be done at some point in the first half of 2019, based on a blog post on the Literature and Latte website from December. If you prefer to wait for the beta to be done, keep an eye on that blog. Once Scrivener 3 for Windows is finally released, I’ll repeat the above process.
Until then, look around the beta and, most importantly, keep writing!


